Concert Photography: Saxophone Sarod Tabla Trio
Some time ago, the Cornell chapter of SPICMACAY (Society for promotion of Indian classical music and culture amongst youth) had a concert featuring George Brooks on the Saxophone, Salar Nader on Tabla, and Alam Khan on Sarod. Being a student with a DSLR, I took some photos at the concert, acting like a pro photographer, and ending up with no images to show that. :)
As always, here's the picture of the concert, with my workflow below:
With any concert, I need to fight low light, which means pushing the ISO up. A fast lens would help, but hey, I'm a grad student on a stipend. So, I open my kit lens as wide as it can, which generally means F5.6 at 55mm. A long focal length also helps, mainly because I need to take photographs without getting in the way of people listening to the concert. Shutter speed should be sufficiently low to prevent camera shake. This left me with the settings: ISO 1600, focal length 55mm, aperture F5.6, exposure 1/50 sec.
Okay, great, now that I've taken the picture, I need to process it some time, otherwise the folder is just a 4GB disk hog. So, load the image up in Darktable
and perform the standard corrections, like white balance Exposure Shadows and highlights EqualiserThen I move on to some basic corrections, like noise removal, lens correction, CA correction etc.
Then, I bump up the vibrance just a bit, with the Velvia module
And modify the tone curve to add some contrastAt this time, I felt that the image would look better in monochrome, because I felt that certain elements, like the background, and the big silver microphone were too distracting.
Which leads us to the final image, as processed by Darktable
So far, so good. The background still seems distracting, so let's get rid of it. Load the image in the GIMP,
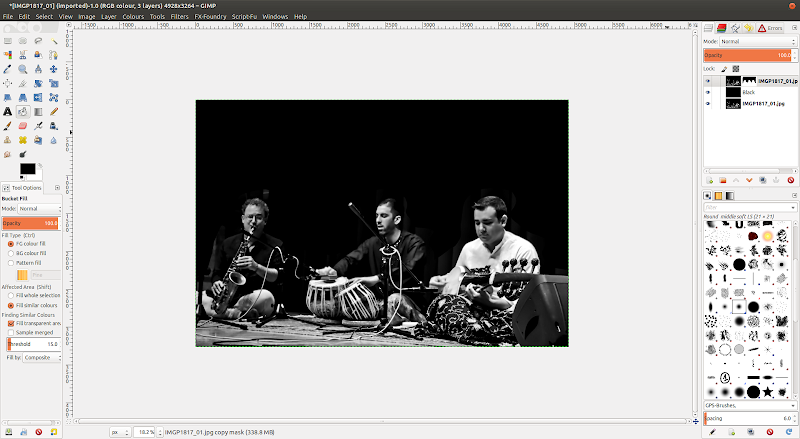
I prefer to follow a non-destructive editing workflow, so I can always rectify any errors. This means not using the eraser tool, instead using layer masks to remove elements I don't want in the final image. So, the next steps involve masking out the background and the distracting mic in the foreground. Duplicate the image as a new layer, add a layer mask, filled with white (full opacity)
Next, add a layer filled with black and place it below the duplicated image layer.
The next step involves using the lasso select tool and selecting most of the background in the image, bucketfilling the layer mask with black (full transparency).
In the next step, I use my Wacom tablet along with a soft brush preset from GIMP Paint Studio (GPS) to clean up the rest of the background. Most of this just involved some careful painting.
Turn on the visibility of the black layer, to check the final results.
Just need a slight cleanup around the mic on the stage right (image left).
Finally, added a signature as a watermark.


Comments
Post a Comment