Handheld exposure fusion using the GIMP
In this post, I show how to effectively capture the entire dynamic range when shooting into the sunset. This technique of photography, called HDR or high dynamic range involves taking multiple pictures of the same scene, exposing one element correctly in each picture, and then combining them later.
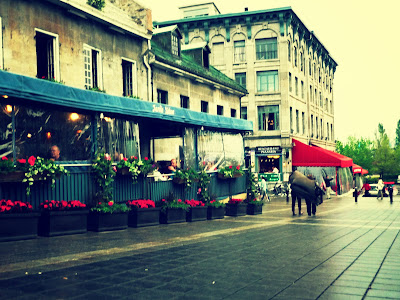
I'll show how to obtain this image from three bracketed images.
Since all I have is a simple point and shoot camera, I believe that this technique can be used by anyone interested in photographing landscapes shooting into the sunset. You don't even need a tripod, though having one can greatly simplify matters.
I use the autobracket feature in my camera (refer to your manual to find out how it is to be used in your camera); that takes 3 pictures at varying exposures. Technically, this method is not accurate, but is the best way I know to minimize camera shake. If I had a tripod, I would set up my camera on my tripod, then manually adjust exposure till each element in the frame was correctly exposed.
The first step is to align the images. Of course, you can do this manually, correcting rotation and lateral shift in the images, but the process is time consuming and inaccurate. A better way is to use hugin_align_stack.
Of course, I realize that I've not yet introduced Hugin at this point, so I shall just advise you to download it from hugin.sourceforge.net. Hugin is a panorama stitcher, so it needs a software to find control points and align images. We shall use the same software.
Use align image stack with this command:
align_image_stack.exe -v -a align_ img1 img2 img3
The flags used are thus:
- -v means verbose.
- -a gives the prefix to be put on the output images.
Now, you should have three images named align_0000.tiff, align_0001.tiff and align_0002.tiff. However, the EXIF data will be missing in these images, a clear no, as you probably want the EXIF data to prove that you took that image (It contains camera model and maybe even serial number, as well as date, time, camera settings and so forth). So, to get the data back, just take your middle exposure, and open it in the GIMP. Then open the aligned images as layers.
At this point, you can probably delete the base layer and save the image. If you use the newer version of the GIMP (2.7 or above), you will save the image as an xcf file, which is a GIMP file. To get the final image, you need to export the image to JPEG or another format.
Now, reorganize the layers so that the middle exposure is at the bottom of the stack, below the underexposed layer, which in turn is under the overexposed layer. Turn off the visibility of the overexposed layer, so that you can see just the underexposed layer.
What we need to do is to get rid of the darker parts in the underexposed layer, they are way underexposed. Keeping in mind our non-destructive editing, we use our popular layer masks to erase parts of the image. Add a layer mask to the underexposed image, in the options, select grayscale copy of layer. The darkest parts of the image are now transparent.
However, we need to improve contrast in the layer mask, so go to curves, and modify the curves such that the darkest parts of the image are completely transparent and the parts correctly exposed are completely opaque.
Then, turn on visibility for the overexposed layer. Add a layer mask as grayscale copy of layer, but invert the mask, so that the overexposed areas are transparent.
Once again, modify the curves in the layer mask to increase contrast.
This is how things should appear now.
Export the image as JPEG, open it in Raw Therapee, increase colour vibrancy and contrast, and there you go, you've created your first HDR image. For the technical ones, this method is called exposure fusion, as it involves taking multiple exposures and fusing them. I'll show the true HDR technique in another post.


Comments
Post a Comment