An introduction to Darktable
I decided that I'll do something different today. I thought that I'd introduce a software that I had not discussed so far, but which is extremely relevant and useful.
Darktable is a raw processing software, but it can be used for a number of image manipulations. It is available only on the Linux/Mac/Solaris platforms, which may be a limitation, but the entire processing is high precision 4x32 bit floating point, GEGL based, with GPU accelerations possible via OpenCL. (Start drooling now!)
I have so far refrained from using Darktable because it's *nix only, and I generally use Windows due to poor hardware support on Linux (for my computer). I guess I cannot go on ignoring it any further. This tutorial will demonstrate a raw file processing workflow using Darktable, and ought to demonstrate just how easy is it to get those perfect effects using minimal clicks.
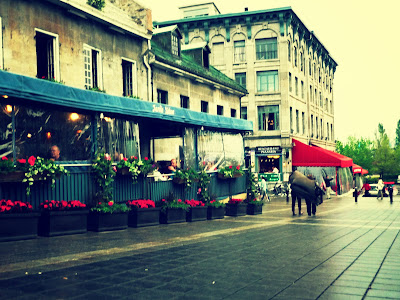
The workflow will show how I obtained this image
from a image which looks like this:The first step is to fire up Darktable and import the folder which contains the camera raw files. Note that the import does not copy files, it simply imports files into Darktable.
The next step is to locate the image of interest using the thumbnails. At this time, I would like to explain the different modes in Darktable. The one shown above is the lighttable mode, which displays all images. The other mode is the darkroom, which is used to manipulate a particular image. Double click on the image of interest to enter the darkroom mode.
The first thing in any workflow is to correct exposure. But before you do that, it may be advisable to take a snapshot, which stores the image as currently displayed. This is useful for comparing results later on. For the exposure, you can select auto, and then the area of interest in the image, and Darktable will try to automatically adjust exposure
however, it's often off the mark. I prefer to manually adjust exposure settings.I then crop out the image of interest, using golden means as guides
Which is followed by adjusting the tone curveI then notch up the vibrance a bit
The next tool is rather interesting, unique and useful. The colour correction may seem daunting at first, but it's easy once you get the hang of it. Basically, it allows for different tints in the highlights and the shadows. You need to draw a rectangle (basically, provide two points) to indicate the tint in the highlights and in the shadows.
adjust the rectangle to adjust the tint. Note that the white bars indicate the tint in the highlights and the dark bars indicate the tint in the shadows and use the mouse wheel or the slider to decrease saturation, just a bit.An interesting feature in every Darktable plugin is the ability to treat the output of the plugin as a layer and blend the layer using blending modes similar to those found in the GIMP. The opacity, and blending modes can be set. In this case, I set the blending mode to normal, and opacity to 70%.
Add a lens correction profile for the lens used.
Then head over to the equaliser tool.
you can choose from a number of presets like sharpen and denoise (selected). Or you could go ahead and manually tweak the equaliser.The next step is to add a vignette.
To add a nice finish to the image, I add a frame
and a watermark while the default watermark is good enough, I prefer my customised watermark which displays title and creator information from the image metadata.I then add the soften filter, which works by merging an overexposed, blurred image with the current image
The default settings are a over the top, so I reduce the mix to a lower valueJust to show how far we've come...
Finally, hit 'Ctrl+E' to export the image with current export options, or switch to lighttable mode, and set the export options
And that's how you process an image with Darktable. Though this was not a raw image, the steps to process a raw image are much the same.
PS: Do let me know what you think of the whole Darktable vs Raw Therapee business. Which one would your prefer. Leave a comment below.


Thank you. I have been looking for basic tutorials on Darktable and yours are clear and easier to follow than the typical videos on youtube.
ReplyDelete